
The Google Campaign URL Builder is an important tool. It allows you to manually tag campaigns so that you can view their performance in Google Analytics. Note that you do not have to use Google Campaign URL Builder for Google Ads campaigns, since Google automatically tags Google Ads campaigns for you.
This is how to use the tool:
First, Go to https://ga-dev-tools.appspot.com/campaign-url-builder/
Second, complete the fields for the campaign that you want to track.
For example, let’s say we’re planning on running a HubSpot-deployed email to current customers, and this is a holiday email blast. In this scenario we might use something like:
Campaign Source: HubSpot Email
Campaign Name: HubSpot Current Customers Holiday Blast 2019
Note that in order to use the URL Builder tool, you only need to add the “Campaign Source” and “Website URL” – the URL where a user will end up when they click the link in the email blast, banner ad, etc. Also, note that the purpose of this tool is for you to be able to identify the performance data related to your Campaigns, so use a naming structure that makes sense in order to look at the data later and know which Campaign you’re referring to.
Here’s an example that I’ve done as a test:
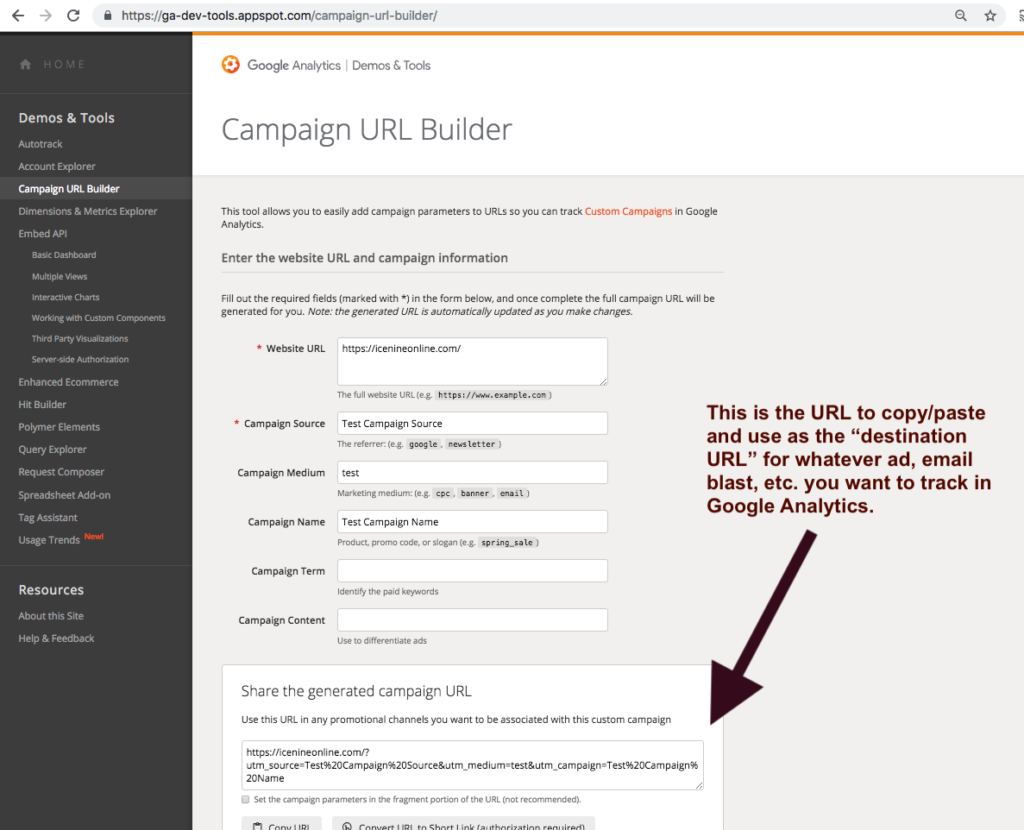
You can see that I’ve completed both the “Campaign Source” and “Campaign Name.” As far as “Campaign Medium,” this is something you can choose to use or not. In some cases, if you want to further differentiate your traffic by medium like “email”, “banner ad”, “remarketing ad” or if you have dashboards or reporting you’ve created to assess traffic by medium, you can use this field. This field is also accessible in Google Analytics for the Campaign. The same goes for “Campaign Term” and “Campaign Content,” which can be used to specify and differentiate specific paid keywords or ads you’re using. For example, if I’m running two ads within the same Campaign, I might specify them and create two separate Campaign URLs (one for each ad) so I can track their performance separately.
Third, test that the URL is working properly in Google Analytics.
Now that I’ve created my Google Campaign URL, I can test it by visiting the URL. Then go to Google Analytics and ensure that the data is flowing through.
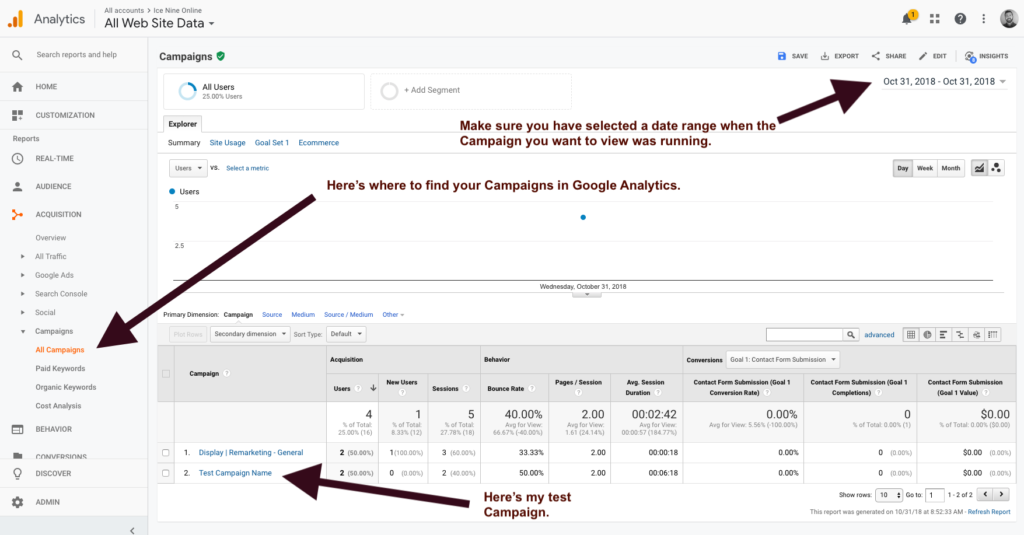
My test Google Campaign URL has been set up properly since I see the traffic from my visits to the Campaign URL under the “Test Campaign Name” Campaign.
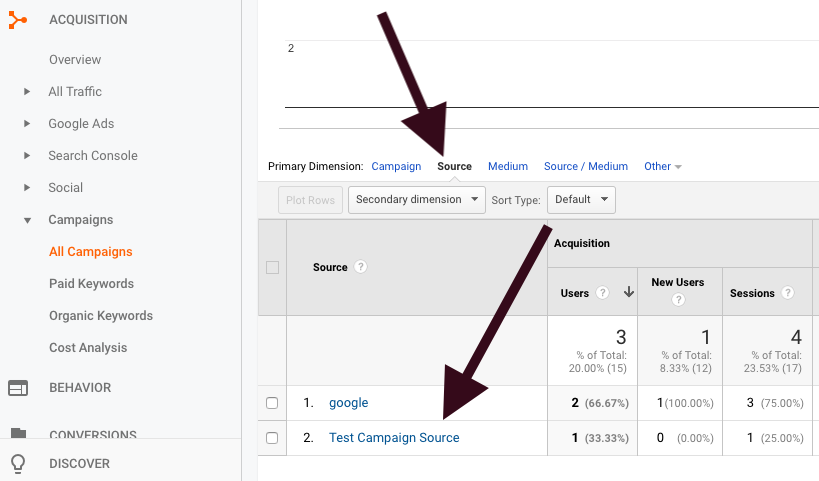
I can also look at the “Source” and “Medium” for this campaign by clicking on the various “Property Dimensions” in Google Analytics.
Here’s where I can check the Campaign “Source”:
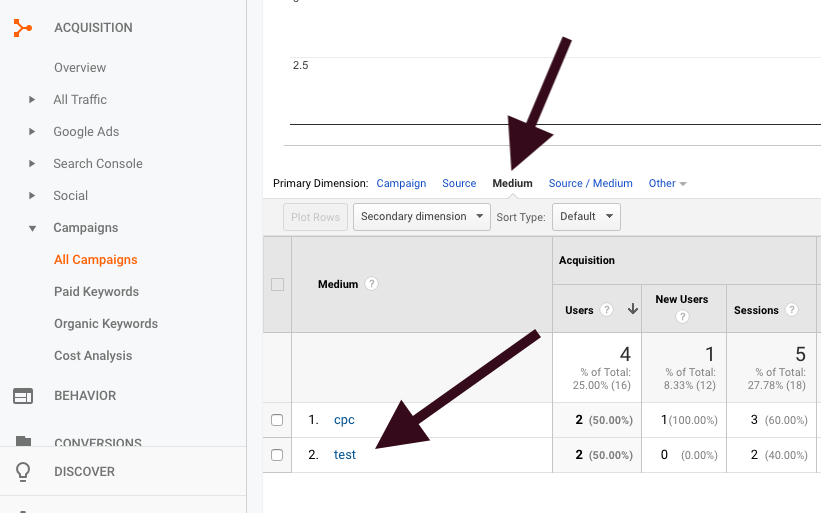
Here’s where I can check the Campaign “Medium”:
Fourth, add the Google URL you created to the Campaign you want to track: as a link in an email blast, as the “destination URL” for banner ad, etc.
If you have any questions about Google Campaign URL Builder or this post, please ask in the comments section below!
About the Author
Share this Post